
This post may contain affiliate links. If a product or service is purchased using a link(s) in the post below a small commission may be earned.
Last updated on July 5th, 2024 at 11:37 am
In 2022 I had an idea to make a craft for a friend of mine. Well, I started by gathering my supplies and looking up ideas.
I finally settled on trying to make a wind chime. It wasn’t very hard but it does take some time and thought.
What you’ll need
This may vary by your wind chime design. But here’s a list of what I used.
I purchased the following products:
- Beads (I used glass but you can use any kind you like)
- wire 20 gauge and 12 gauge ( I used copper or copper-aluminum but you can use any you like)
- monofilament thread or cording
- bell or chime option
- scissors
optional items:
- small pliers or jewelry pliers
- hanging hook or chain
- a beading needle
once you settle on your design
Once you settle on your design you can start beading. I used a variety of different beads in this craft.
I used a mix of smaller ones and larger ones. I also used a few different shapes as well.
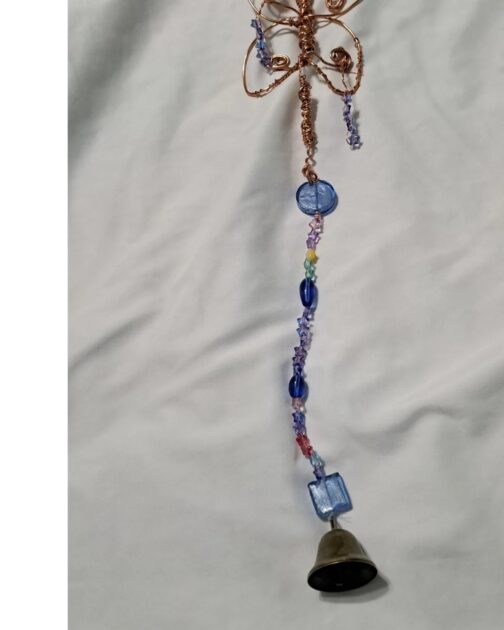
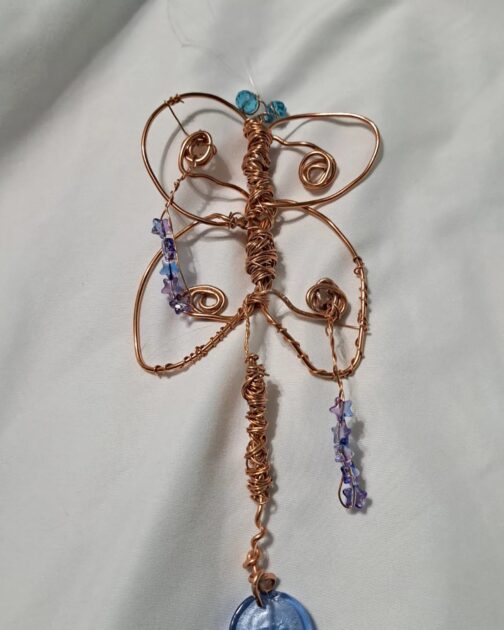
I decide to make my friend a butterfly wind chime.
I started out by finding the beads. Again you can use any kind you like glass acrylic, pony, etc.
I opted for glass ones because I figured if she hung it near a window it would add a nice burst of color when the light hit it.
Pal’s Tips 🐾
A note about beads and monofilament
if you will be using glass beads remember this: buy larger beads (MM) size anything over 8 mm is best. If you can find 10 mm it will be perfect.
Depending on the thickness of your wire or monofilament thread you will need to size up to make sure you have a smoother beading experience.
when using wire
Always purchase a thinner wire such as a 12 gauge or thinner. If you have a smaller mm (millimeter) bead it would be best to use a thinner wire for easier beading.
constructing your wind chime
Depending on your design or desired style you can start with your beads. I found that stringing the beads can be a bit of a challenge if you have a thicker monofilament thread or wire.
If you have larger millimeter beads such as a 10 or 12 these will work well for a thicker monofilament thread. Some DIY posts I read suggested you double your cord for a more secure fit.
I found that this worked well. You can string as many as you like. I used a few larger ones from a set of beads sold a Michael’s by the name of bead landing.
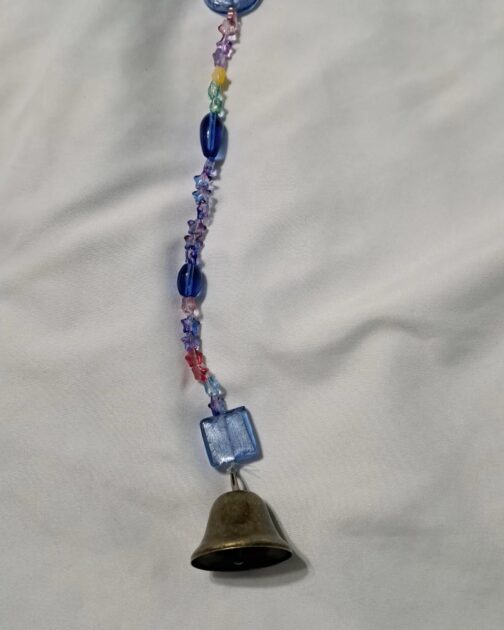
I would suggest you double or triple-knot your monofilament thread and leave enough at the end to add your bell or chime option.
If you are using a thinner monofilament cording for jewelry a triple knot may be necessary for a secure hold.
You can also use a crimp bead as well if you know how to attach those.
when picking a bell
If you chose to add a chime or bell you can choose any type you like. I happened to buy a box of a dozen from Amazon. They were for holiday decorations. I liked them because they weren’t too harsh or loud. Some wind chimes freak my cats out on windy days.
So if you have someone or a pet(s) who is sensitive to should take that into consideration.
Other chime options
You can use old silverware, parts from old or broken wind chimes, and old keys, the possibilities are endless.
making a butterfly can be tricky
Making a butterfly shape can be a bit tricky. I saw a few tutorials that suggested you make a B shape with your wire and elongate it with pliers. I tried this and it didn’t turn out so well. So I just made mine look a bit more rustic.
I used 12 gauge wire and wrapped it with the smaller 20 gauge wire. I also added a few more beads. if you and loops or scroll shapes this is when a pair of jewelry pliers come in handy.
Remember to leave room to hand it
You can add an extra piece of monofilament thread or wire to add a hanging look or hook.
I tied an extra piece of monofilament thread to the butterfly for hanging.
A few tips for hanging this
Being that I used glass beads for my wind chime I would suggest you hang it in a secure place and on a sturdy hook.
Other glass bead crafts
I also mad my friend a glass bead butterfly. This one was made with wire.
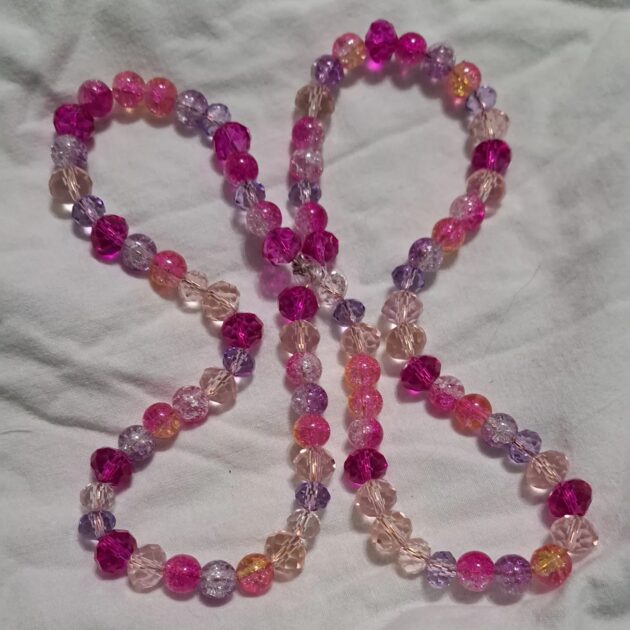
This one was a bit easier to make. I found that again if I used 6 mm or 8 mm glass beads they threaded easier on the 20 gauge wire.
Once you bead an entire side you can either trim it or twist the wire and bead the other side. To connect the wires I used monofilament thread to keep the wires together.
These crafts can be fun and help work on your creative side.
Share your craft ideas in the comments below.